The fun part is about to start!
Friday 12 June 2015
Fresh from the paint shop
Today was a great day as I picked up the fuselage from the paint shop! The whole front cell of the fuse was sanded, primed with an epoxy primer and painted with a light gray, matching the rest of the fuselage structure. Here are a few shots:
The fun part is about to start!
The fun part is about to start!
Tuesday 9 June 2015
Welding Part II and return to base
Yes you've read the title right! Big milestone reached in the repair process last week-end: the welding of the fuselage is complete!
The following was completed since the "welding part 1" post:
View looking down showing the bottom tubes and the bushings:
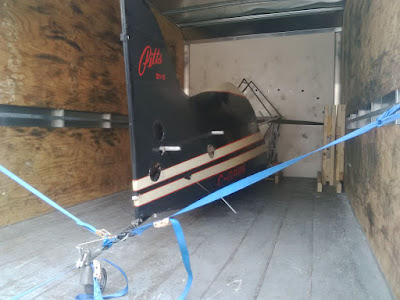
This time I rented a truck to bring the fuselage back to the hangar:
...and finally, the fuselage back in the hangar!
The following was completed since the "welding part 1" post:
- Finished the welding of the bottom tubes
- Welded the side diagonals
- Welded the sidelugs
View looking down showing the bottom tubes and the bushings:
This time I rented a truck to bring the fuselage back to the hangar:
...and finally, the fuselage back in the hangar!
Next step is the paint job. Stay tuned!
Saturday 6 June 2015
Sidelugs
One of the last steps of the welding process is to weld the sidelugs on the bottom longerons. I've contacted many local sheet metal shops to see if they could bend the 0.025" thick 4130 sheet I had. The bends required are close to each other and shops were generally reluctant in doing the job. I therefore decided to make them myself.
My initial design looked like this:
My initial design looked like this:
The original sidelugs did not include the step as you can see above. I needed to add this step in order to accomodate the new thickness change of the lower longerons. However, making this out of one piece with the few tools I have was a little complex so I decided to split it into two parts:
Had to make a holding tool to make sure that the metal was securely held in place. I used two pieces of 3/8 thick mild steel with a little radius on the corner of one of them. Here is what my bending setup looked like:
I used screws going through both plates to provide additional clamping force near the edges. The bar you see on the right is a piece of 1/2" thick steel I used to hammer the base of the protruding part of the sheet metal. It took a lot of effort to bend this only with a hammer. After two nights of work, I had the four pieces bent the way I wanted:
The last step before welding to the fuse is to trim the excess material used to clamp them in place. I left this job to my welder since he is going to determine their final location and might need extra length.
Next post will be about the final welding and if everything goes well, about the ferry back to my home airport!
Subscribe to:
Posts (Atom)


