Showing posts with label fuselage structure. Show all posts

Saturday, 25 June 2016

Side panel brackets

Flight tests at work being quite demanding lately, I can barely work on the Pitts. Last week-end, I had a few hours to work on the aluminium brackets that snap on the top longerons to attach the side panels.

They originally had nyloc nutplates. I decided to change them to all metal nutplates for multiple reasons:

- The rivet holes on the brackets were not dimpled, therefore the rivets were chafing with the aluminium panels
- Nyloc may not be reused if the nylon doesn't provide enough friction (AC43-13)
- All metal nutplates are smaller and lighter

Took me a few hours to drill the old rivets, dimple all rivet holes, dimple all new nutplates and squeeze all the new rivets in place. I used a hand rivet squeezer from my friend Scott both for doing the dimples and rivet squeezing. My friend Marc also helped in replacing the nutplates on the rear brackets. Thanks Scott and Marc!

Here is the new vs old nutplate comparison:


I may have to partially tap the nutplate threads as they are pretty tight. I'll see once I will try to reinstall the side panels. Here is the result once snapped on the fuse:


Will stick some anti-chafing tape on the brackets before reinstalling the panels. I'm thinking of replacing  nutplates also on the vertical braces (right of the above picture), but the access may be challenging for dimpling and riveting. 

Mission for next work session at the hangar: install the main fuel tank.


Sunday, 20 March 2016

Landing Gear Installation

Today, a great milstone was achieved on my rebuild: I reinstalled the landing gear with its new attachment points design.

As explained in this post, a major change in the way the gear is attached to the fuse was required. I got the last part I needed last week: the butterfly plate. Big thanks to my friend Scott for cutting the part with his router. I also thank my brother-in-law Jean, who anodised the part in his shop!

So here's the assembly.

Orange: butterfly plate made of 0.065" thick 2024-T3 aluminium (grey anodised)
Green: radius plates made of 7075-T6 aluminium (black anodised)
Blue: Backing plates made of 303 SS


I lifted the tail high enough so that the bottom longerons are parallel to the ground, easing up the installation of the gear:


Once all fasteners properly torqued:


Details of the stack:

Next step is to prep the engine before reinstalling on the airframe. I like where this is going  : )


Sunday, 22 November 2015

lower wing to fuse bushings + idler

Quick update for today. I mixed some gray epoxy paint and painted my new idler:


I used the remaning paint to paint the lower wing bushing that I needed to replace. This closes the loop on a long head scratching exercise (see post here).


Next step is to install new KP4 bearings in my new idler and begin the reassembly of the pitch control system!

Sunday, 30 August 2015

Lower wing attachment #2

Just a quick update today: I cutted off the bushing to final dimensions. It's now ready for primer and paint!


PS: yes I will use a longer bolt!

Thursday, 27 August 2015

Lower wing attachment

Over the last month, I went to AirVenture for the first time and I moved right after my return so I had no time left for the Pitts but now I'm back into it!

Last couple of days I worked on an issue my friend François (who won the Canadian Nationals in intermediate last week!) snagged on my airframe: an elongated hole on one of the lower wing attachment point on the fuselage:


On this view, the hole elongation is clearly visible (about 1/16th play!):


At the begining I really didn't know what to do, but I called my other friend, Mark the welder and he told me it was possible to weld a new bushing. First I fitted my LH lower wing with the great help of Marc-Antoine (my partner on the Citabria) in order to locate the required position of the bolt. Then I had to make myself a little jig with a piece of aluminium to ensure I mark where I wanted the bolt to be aligned:


Then I grinded off the old bushing using my dremel with a cutting disc:


Next step was to enlarge the hole to the OD of the bushing and remove the paint on the forward lug of the bracket:


Then I called Mark and asked him to come over and weld the new bushing in place. We placed fiberglass cloth as well as wet cloth to protect the fabric from the heat:


Then Mark used his magic and welded the new bushing in place:


Next step will be to grind off the bushing flush on the aft end and a little shorter on the forward end. Then I'll have to prime and paint... Stay tuned!

Friday, 12 June 2015

Fresh from the paint shop

Today was a great day as I picked up the fuselage from the paint shop! The whole front cell of the fuse was sanded, primed with an epoxy primer and painted with a light gray, matching the rest of the fuselage structure. Here are a few shots:


The fun part is about to start!

Tuesday, 9 June 2015

Welding Part II and return to base

Yes you've read the title right! Big milestone reached in the repair process last week-end: the welding of the fuselage is complete!

The following was completed since the "welding part 1" post:
  • Finished the welding of the bottom tubes
  • Welded the side diagonals
  • Welded the sidelugs
The team in  Aerosoudage did an excellent job. Here is a picture of the RH lower longeron with its sidelug in place:


View looking down showing the bottom tubes and the bushings:


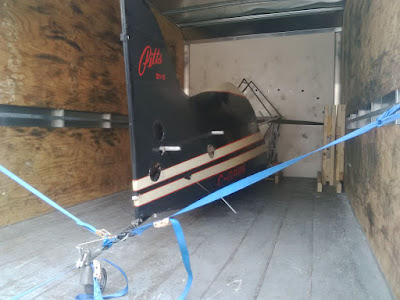
This time I rented a truck to bring the fuselage back to the hangar:


...and finally, the fuselage back in the hangar!


Next step is the paint job. Stay tuned!

Friday, 10 April 2015

What happened?

Once I got back home, I couldn't wait to get to the hangar and see if I had those radius plates. It turned out I didn't. My installation was something particular with four bolts per side to attach the gear with big, wide flat plates...

Having now more information on the problem, I made a better inspection of the fuselage structure and found the following:

  • The fuselage tubing paint around the gear area on the LH side is starting to peel off and light surface corrosion is starting. The paint on the RH side is all nice and glossy.
  • Some welds on the LH side look like shit, seriously. Maybe shit is nicer actually. The RH side equivalents are superb.
  • The cracked diagonal on the LH side has a fishmouthed sleeve which indicates it's been repaired. Also, if I looked along the tube axis, I could see it was bent.
  • The lower LH longeron seem to have a weld along its axis near the gear location, which is not present on the RH lower longeron.

In light of the above observations, here is my theory of what happened to this aircraft in the past:

  • At one point in time, the left longeron was badly damaged due to the torsional loads and the owner did not realize.
  • Then something major happened, probably the gear collapsed into the fuse on one side during landing. Hopefully the airplane was not ground-looped. The bottom wings don't look repaired and the fabric is not patched.
  • Unfortunately, the owner at that time probably didn't know about the radius plate fix, and simply welded back the pieces together, without fixing the root cause of the problem.
  • The repair was done quickly, probably without removing the engine or the systems, explaining the paint marks on the purge valve sleeve.
  • The welds being so bad, they created a stress riser in a rough area and it cracked.

Now what? What do I do with all this? One thing for sure is I want to install radius plates so I ordered some to Grove Aircraft. One other thing for sure is I want to remove and replace the cracked member. I am still not fixed today on whether or not I change other members of the forward fuse or if I just install beef-ups like a sleeves or gussets. Anyway, the removal of the cracked member involves the removal of the engine, wings, fuel and systems in order to have the best access to the damaged area and do a proper job. Next post will be on the progress of the removal of engine, wings and systems.