Showing posts with label radius plates. Show all posts

Friday, 10 April 2015

What happened?

Once I got back home, I couldn't wait to get to the hangar and see if I had those radius plates. It turned out I didn't. My installation was something particular with four bolts per side to attach the gear with big, wide flat plates...

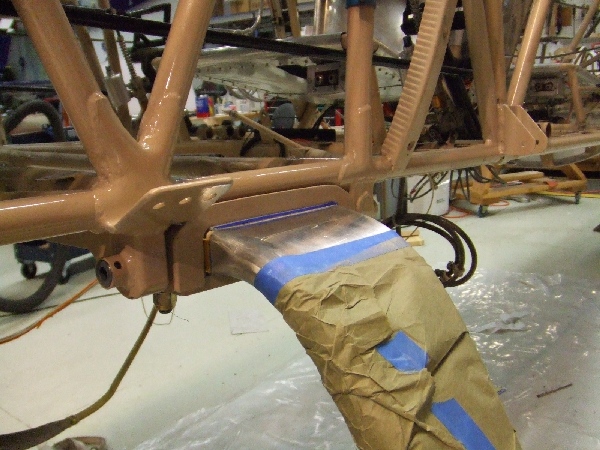
Having now more information on the problem, I made a better inspection of the fuselage structure and found the following:

  • The fuselage tubing paint around the gear area on the LH side is starting to peel off and light surface corrosion is starting. The paint on the RH side is all nice and glossy.
  • Some welds on the LH side look like shit, seriously. Maybe shit is nicer actually. The RH side equivalents are superb.
  • The cracked diagonal on the LH side has a fishmouthed sleeve which indicates it's been repaired. Also, if I looked along the tube axis, I could see it was bent.
  • The lower LH longeron seem to have a weld along its axis near the gear location, which is not present on the RH lower longeron.

In light of the above observations, here is my theory of what happened to this aircraft in the past:

  • At one point in time, the left longeron was badly damaged due to the torsional loads and the owner did not realize.
  • Then something major happened, probably the gear collapsed into the fuse on one side during landing. Hopefully the airplane was not ground-looped. The bottom wings don't look repaired and the fabric is not patched.
  • Unfortunately, the owner at that time probably didn't know about the radius plate fix, and simply welded back the pieces together, without fixing the root cause of the problem.
  • The repair was done quickly, probably without removing the engine or the systems, explaining the paint marks on the purge valve sleeve.
  • The welds being so bad, they created a stress riser in a rough area and it cracked.

Now what? What do I do with all this? One thing for sure is I want to install radius plates so I ordered some to Grove Aircraft. One other thing for sure is I want to remove and replace the cracked member. I am still not fixed today on whether or not I change other members of the forward fuse or if I just install beef-ups like a sleeves or gussets. Anyway, the removal of the cracked member involves the removal of the engine, wings, fuel and systems in order to have the best access to the damaged area and do a proper job. Next post will be on the progress of the removal of engine, wings and systems.

The research

The day after The Finding, I was flying to Wichita for business and I remember all sorts of questions were going through my mind. How am I going to fix this? How long I'm going to be grounded? But mainly: Why is my fuselage cracked?? I left home that morning with the firm intention of coming back two weeks later with answers to my questions.

Here's a little summary of what I found by talking to Pitts gurus in Wichita and on forums.

  •  There is an old, well known problem with spring gears mounted on metal tube fuselages: if the attachment points are rigid in torsion, the flexing of the spring gear induce torsional loads on the longerons which will fail with fatigue, one day or another. The Grove Aircraft company in California has a website that illustrate this well:
  • One way to prevent these torsional loads to be transferred to the fuselage structure is to install radius plates instead of flat plates in between which the gear is clamped. This allows some flexing along the X axis. As the gear flexes, the line of contact will follow the radius and therefore only forces will be transferred to the fuse, not moments.


I found the following references regarding the installation of radius plates on different aircraft:

I also learned that the Pitts Model 12 and the Steen AeroLab S1 are designed with radius plates.
  • The heavy duty installation is to create a hinge like the Extra 300. However this is something quite difficult to retrofit on an already existing fuselage:
Source: NickyP on biplaneforum.com

  • With a spring gear installation, the fuselage needs additional strength compared to the original bungee gear fuselage. The diagonal member that go from the back of the gear to the top engine mount attachment point is not part of the original Pitts plans and is specific to the spring gear installation. In addition to that, Steen adds a sleeve over the forward portion of the bottom longeron to provide additional strength at the gear location. See Biplane Forum threads here and here.
  • A spring gear on a Pitts typically requires the installation of a "butterfly plate" i.e. an aluminium sheet that is bolted to the center of the gear as well as on the gear attachment points. This plate is to prevent lateral movements of the gear (along the Y axis) relative to the fuselage. See biplane forum thread here.
Now, what do I have on my airplane? The diagonal member is there; it's the one cracked! For the radius plates, I did not know until I came back from my trip. But even if I didn't, how come the crack appeared near the top longeron? I had to come back home to answer these questions...